


Features:
USB Type-C PD Chargers
USB Type-A Chargers
Multi-Port USB Chargers
Integration-Ready Charging PCBAs
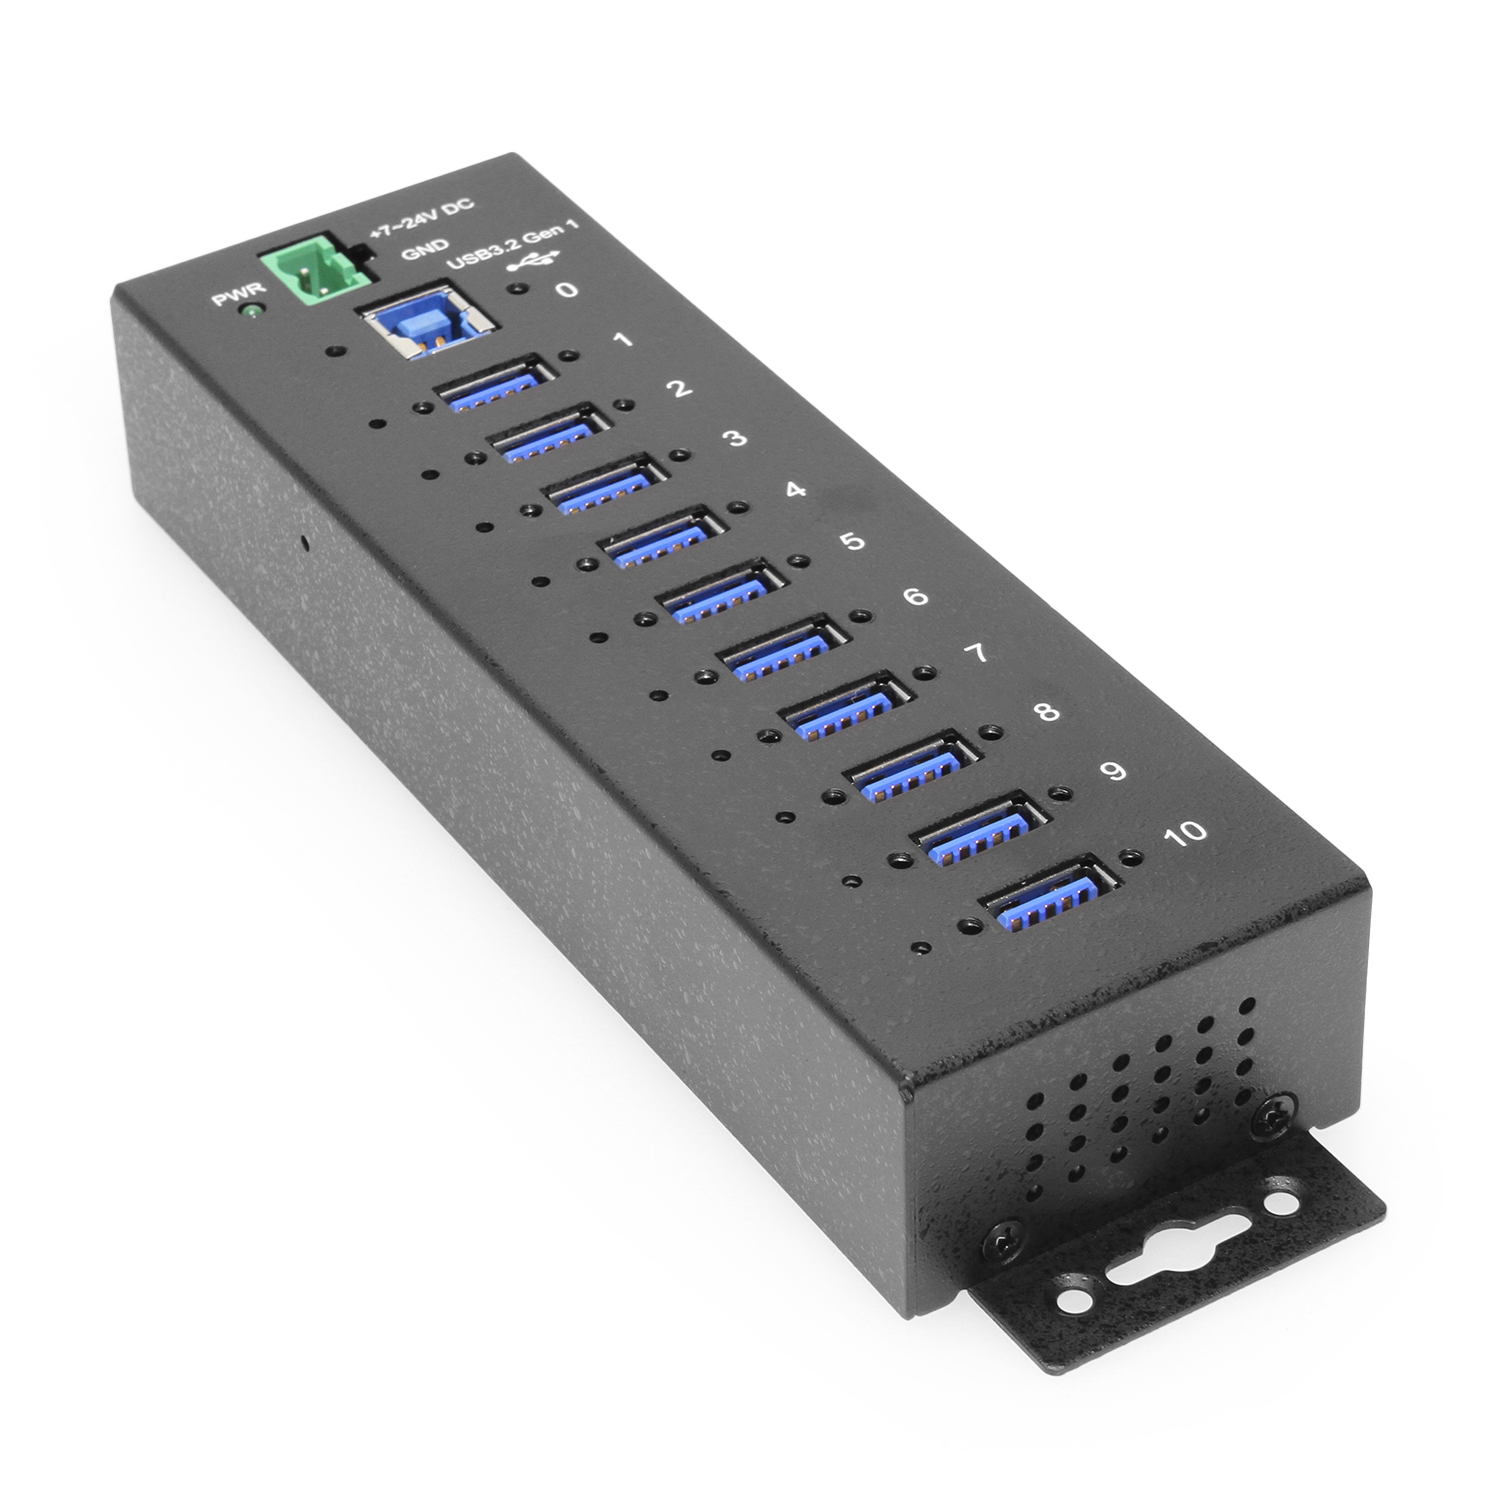
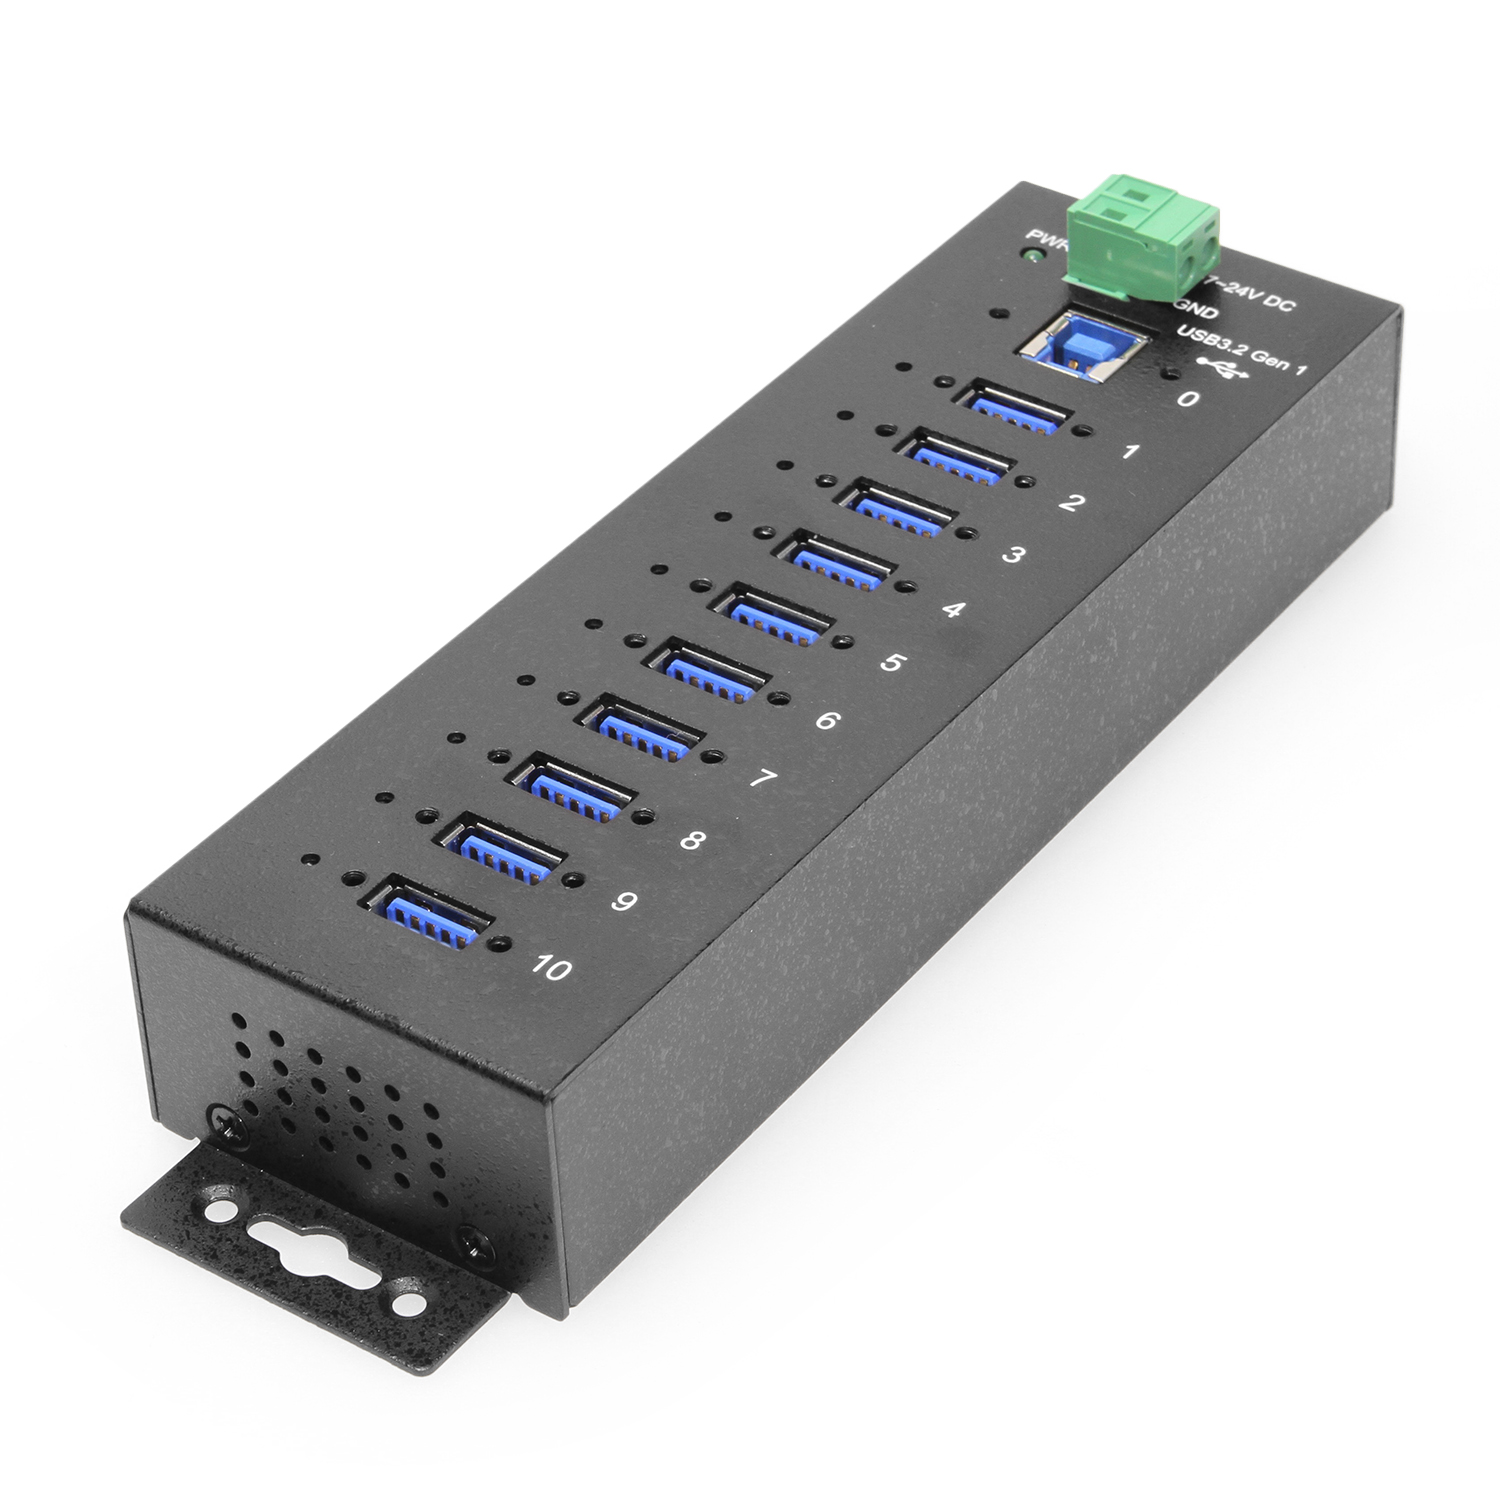
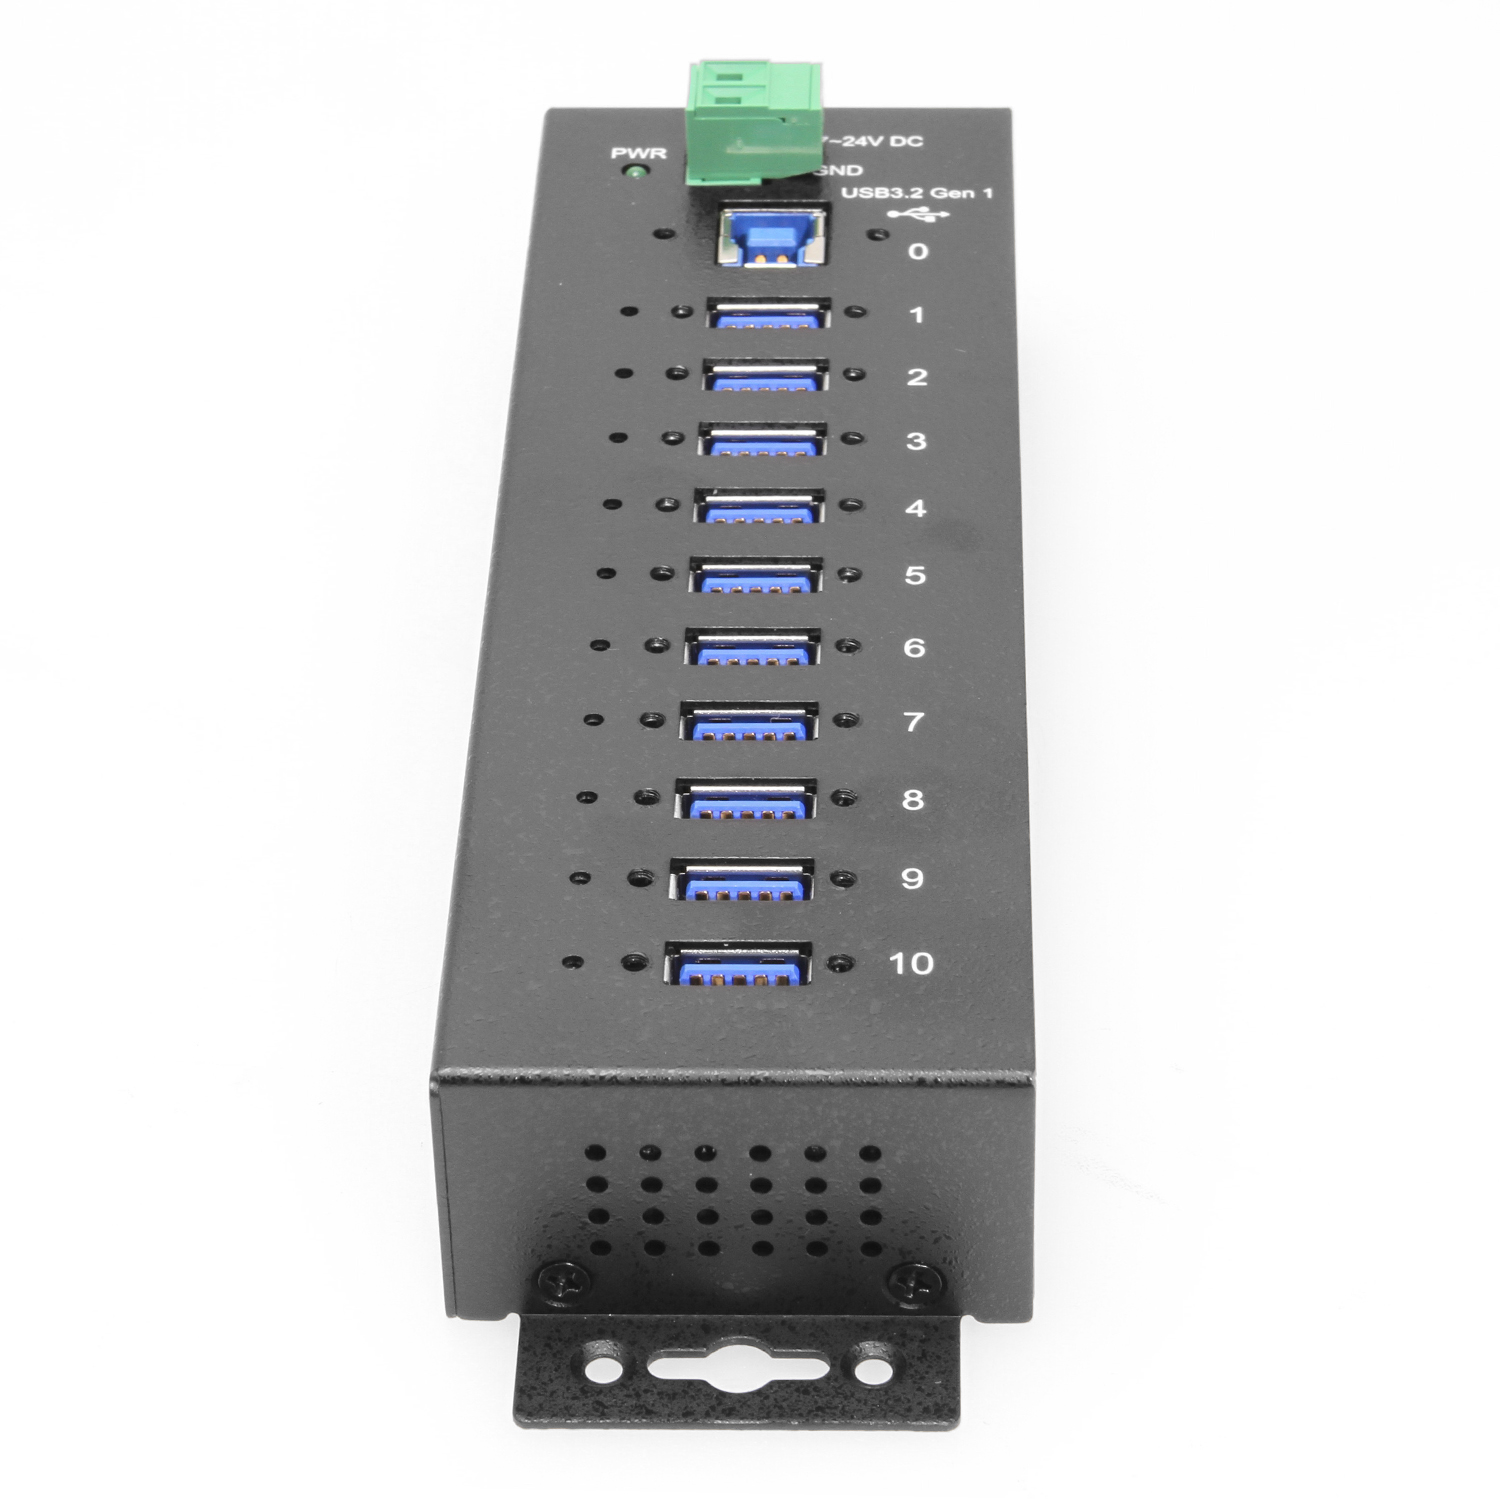
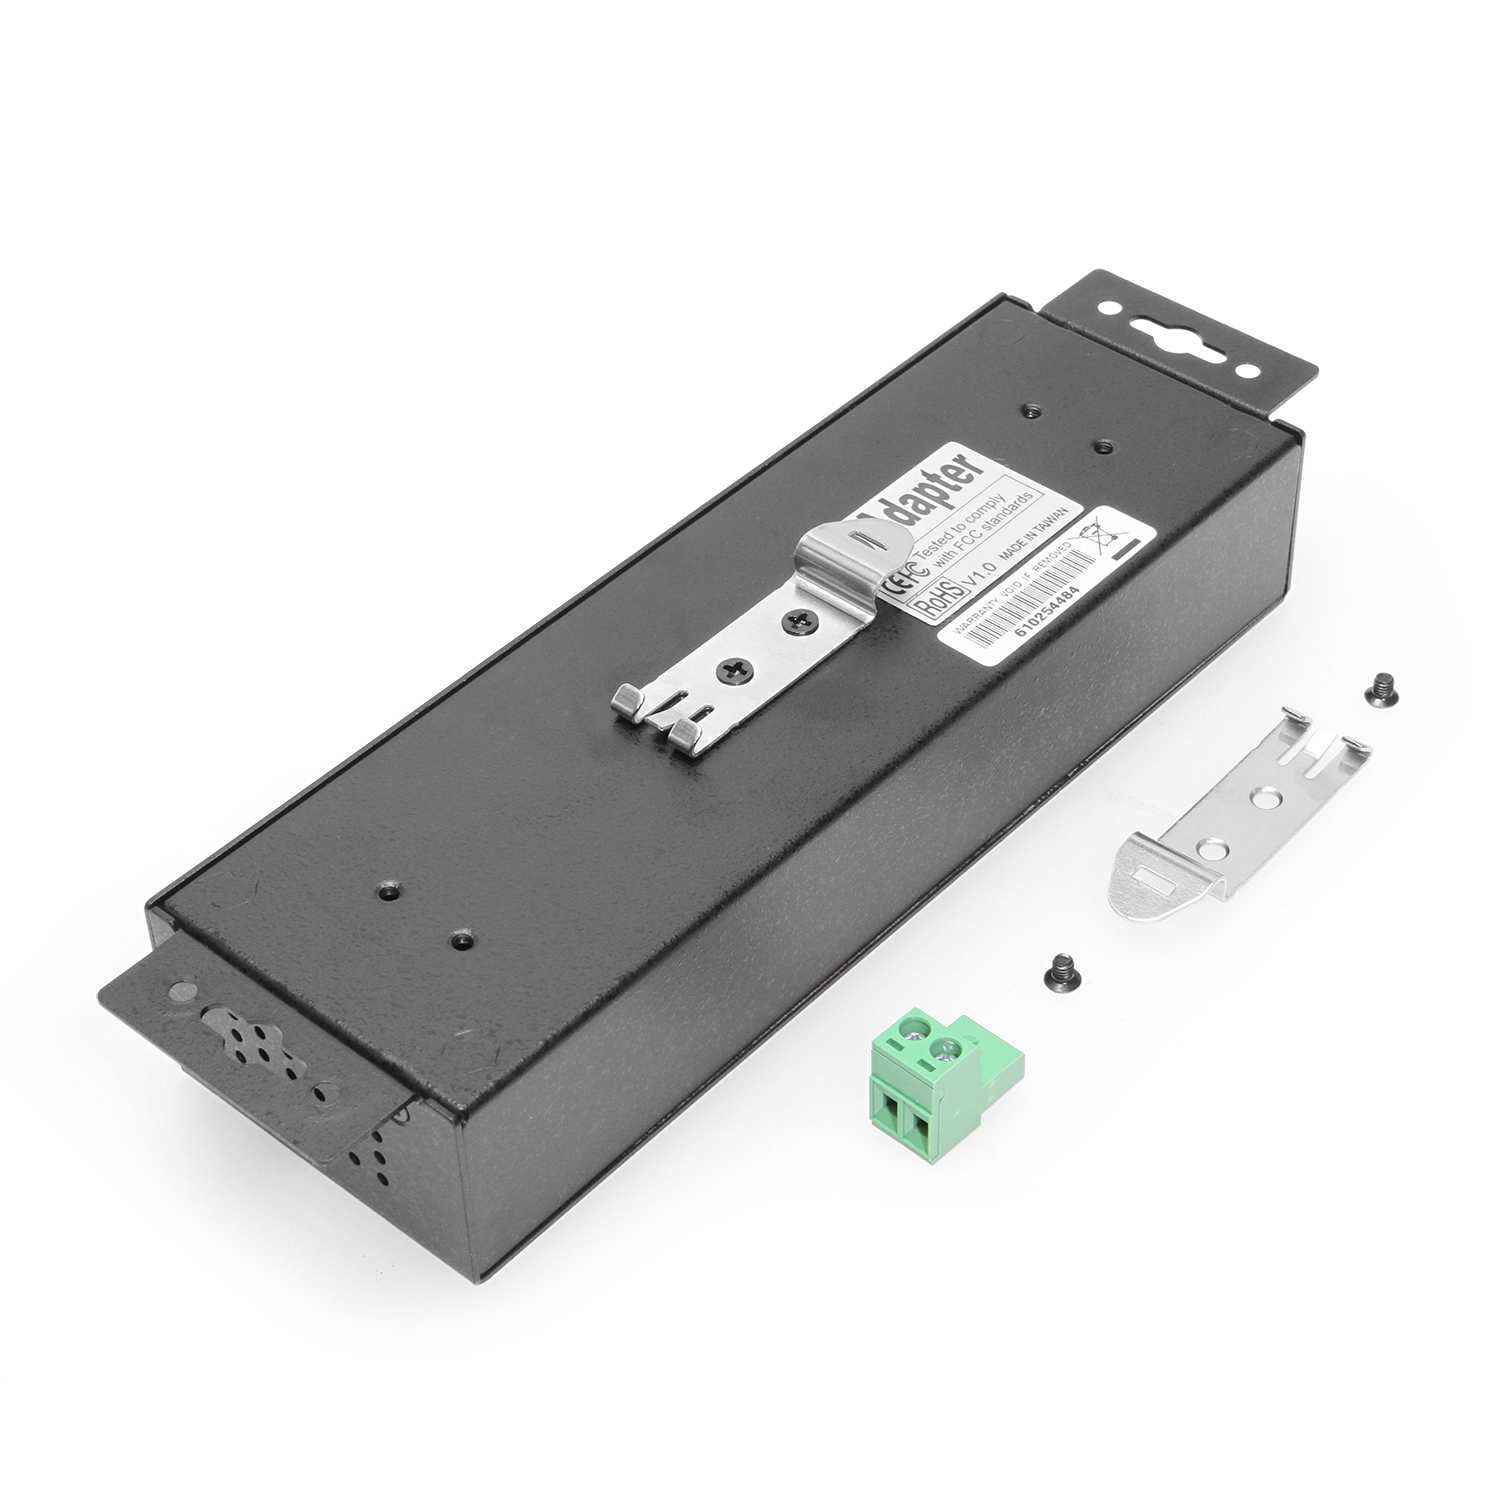
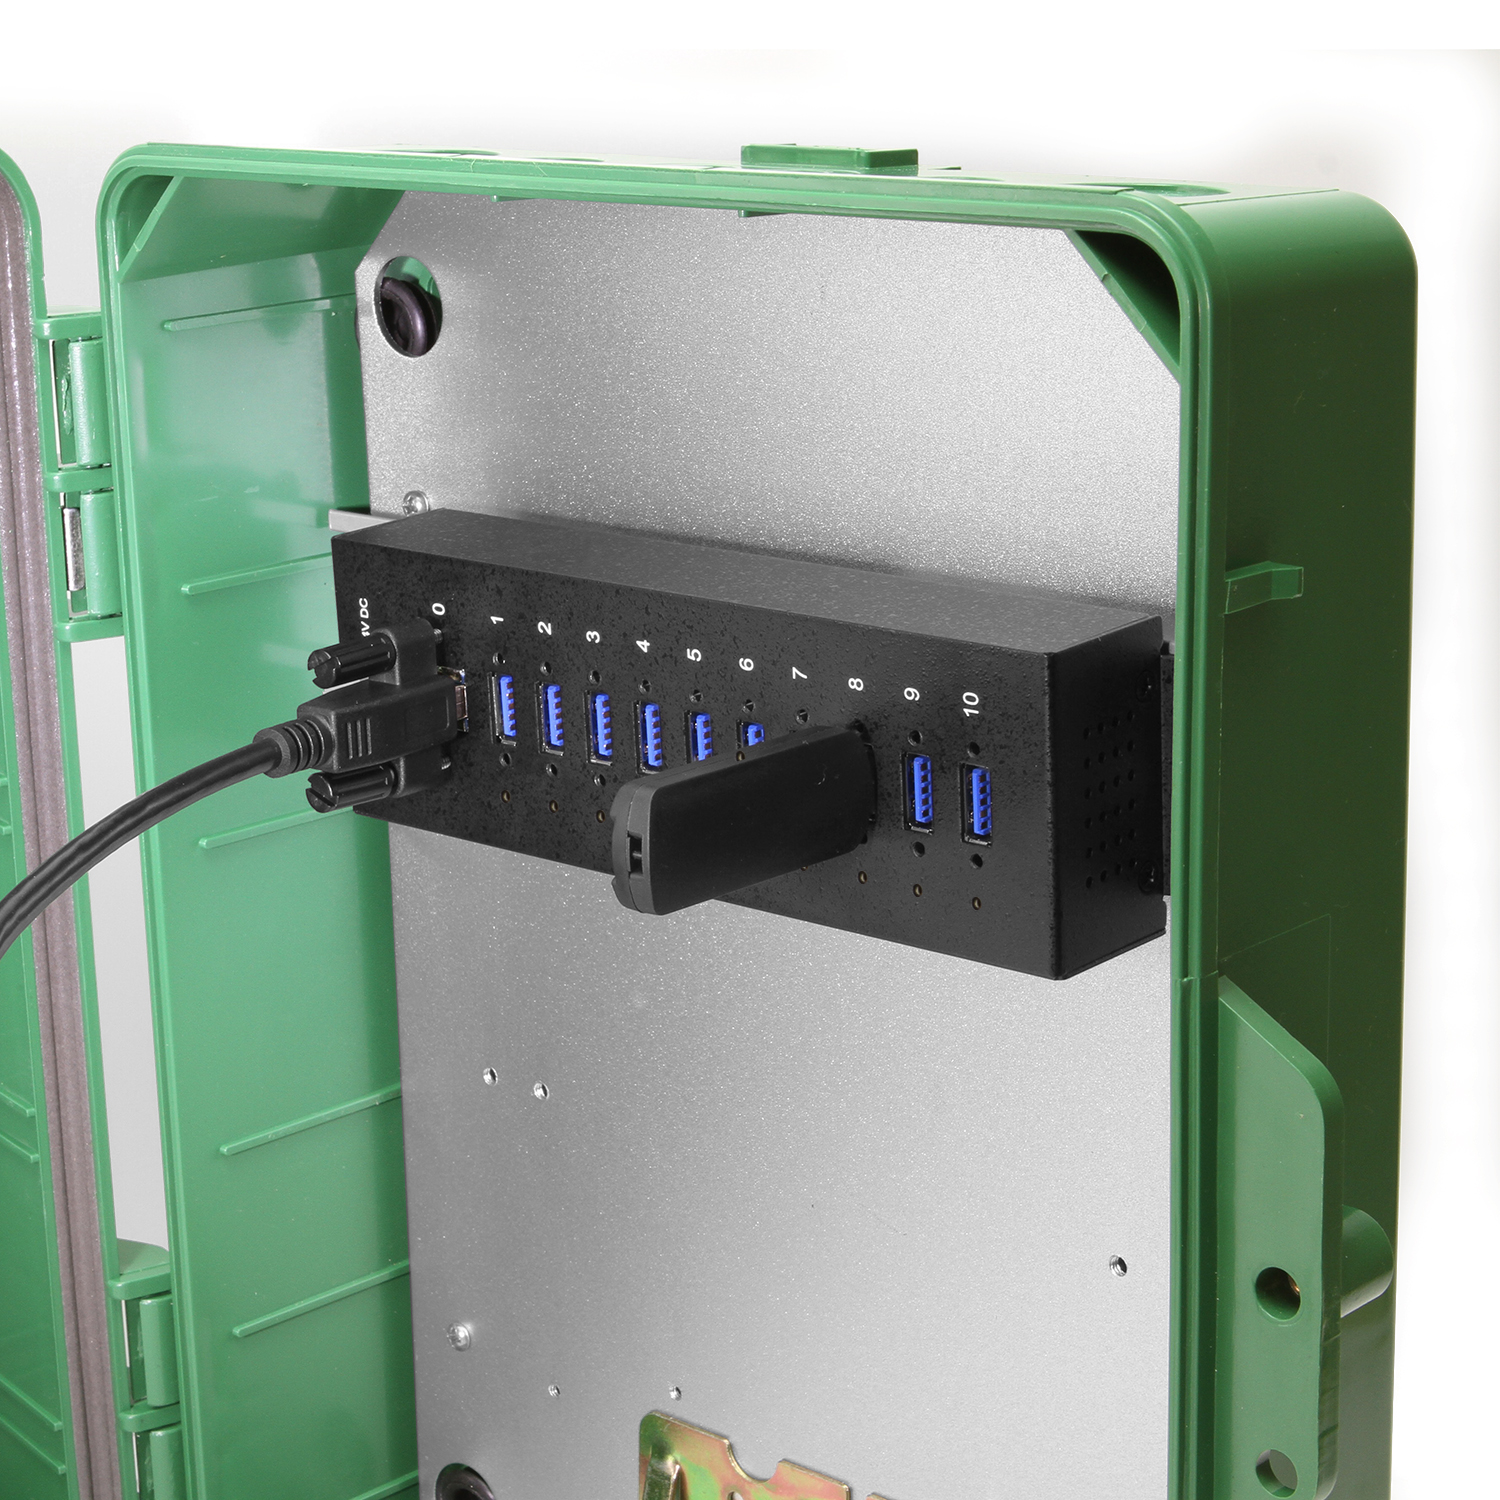
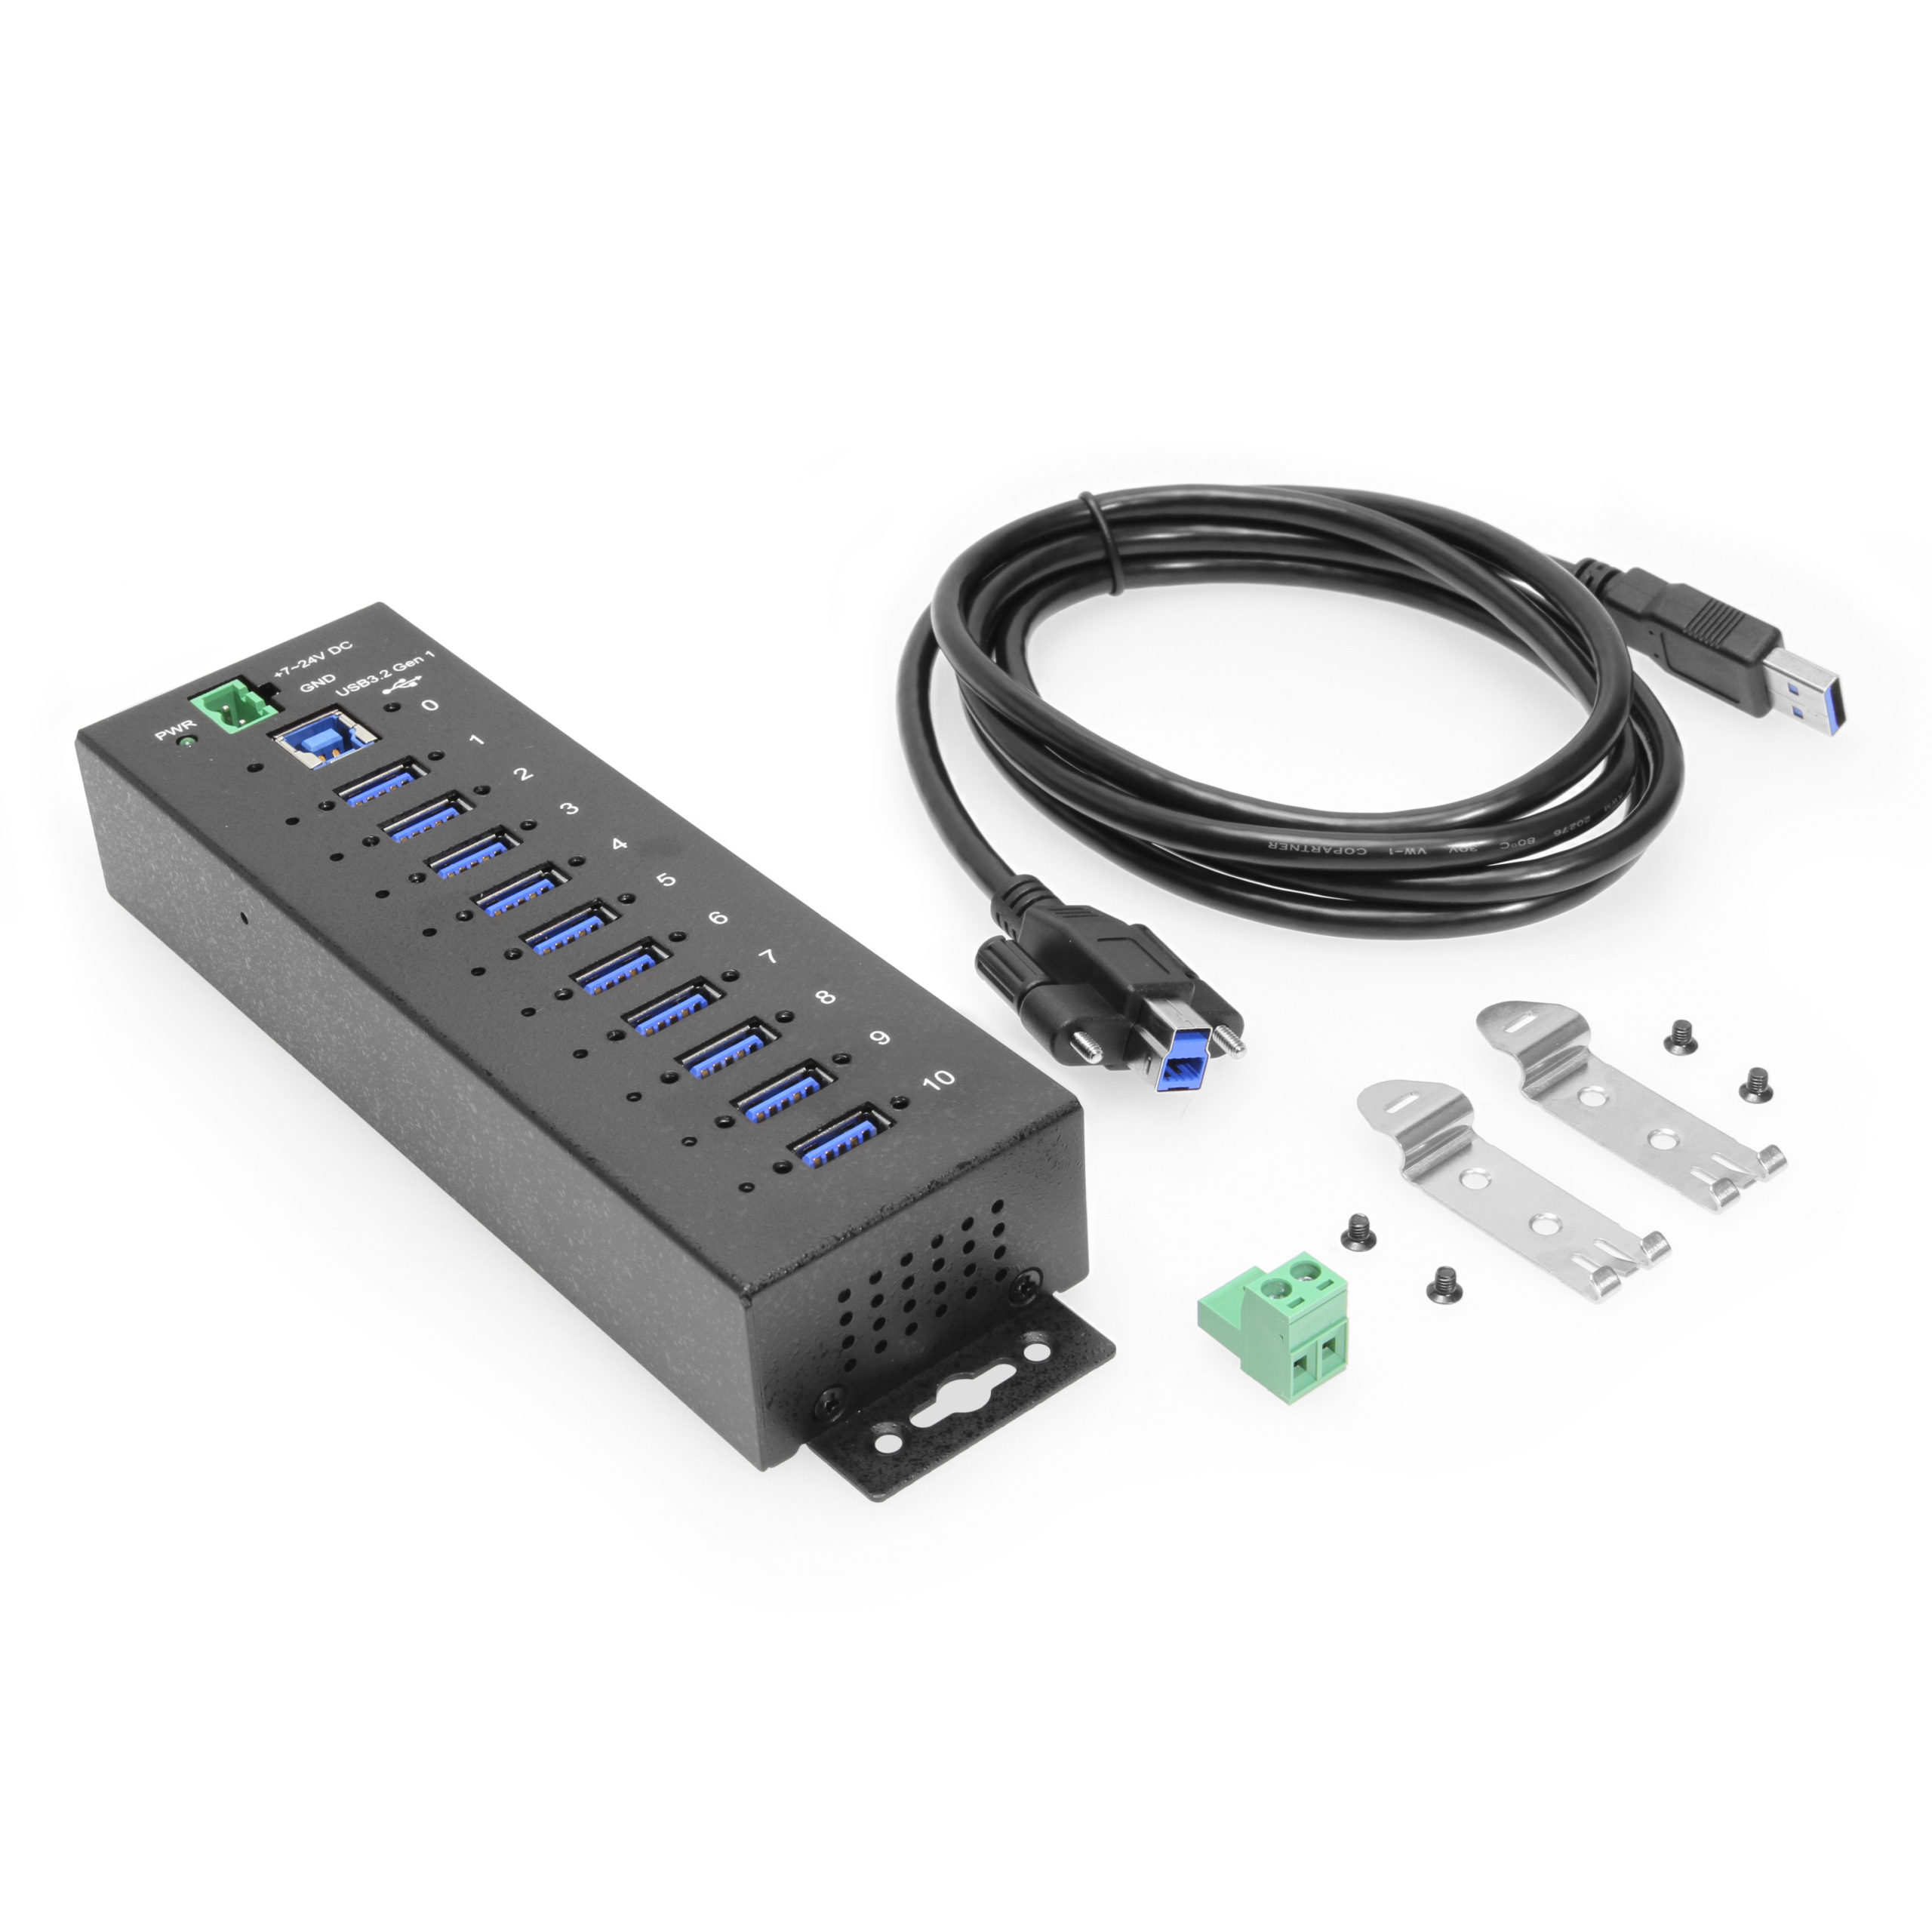
Meet the CG-10PU3MGD-NT, a feature-rich USB 3.2 Gen 1 hub designed for industrial environments that demand robust connectivity and advanced control. As part of our MDS-UH Port Management Series, this managed USB hub provides ten downstream USB 3.2 Gen 1 ports and integrates software-controlled power switching and remote port management (Network-based remote management is supported on Windows ONLY. Direct host connection and downstream port management remain available for Windows, Linux, and macOS). It’s a versatile solution for those needing high-speed data transfer, programmable port power management, and reliable performance across Windows and Linux systems.

Note: The last USB port of this hub (Port 10) does NOT support USB 2.0 / 1.1 devices. It is used to communicate with managing utilities. However, it still supports USB 3.2 Gen 1 devices.

Image: Port managing software displaying the On/Off status of each port.
Surface Mounting Screws Not Included
| Identifier |
| ||||||||||||||||
|---|---|---|---|---|---|---|---|---|---|---|---|---|---|---|---|---|---|
| Power |
| ||||||||||||||||
| Compliance |
| ||||||||||||||||
| Physical Characteristics |
| ||||||||||||||||
| What's in the Box |
| ||||||||||||||||
| Software |
| ||||||||||||||||
| Environmental |
| ||||||||||||||||
| Product Information |
| ||||||||||||||||
| Hardware |
| ||||||||||||||||
| Performance & Safety |
| ||||||||||||||||
| Other Data |
|
The CG-10PU3MGD-NT has been rigorously tested to meet the highest international safety standards. Our comprehensive testing ensures you can rely on the device in even the most demanding automotive, industrial, and commercial applications.
| Standard | Certificate/Test Report | Status | Remarks |
|---|---|---|---|

|
Report: General Product Safety Regulation: (EU) 2023/988 / EMC Directive: 2014/30/EU Cert.: EN 55032:2015+A11:2020+A1:2020 EN 55035:2017+A11:2020 EU PoP 2019/1021 |
✓ Compliant | – |
| Report: FCC 47 CFR Part 15 Subpart B Cert.: FCC Part 15, Subpart B, Class B ANSI C63.4: 2014 ANSI C63.4a-2017 |
✓ Compliant | – | |
 |
Report: EC/1907/2006 – 250 SVHC List 06/25/2025 | ✓ Compliant | – |

|
Report: RoHS Legislation Cert.: 2011/65/EU + (EU) 2015/863 |
✓ Compliant | – |
*Passing a test report does not constitute certification, listing, or product registration. Test Report Available – Certification Required for End Product
View frequently asked product questions below. Still need help? Reach out!
In some cases, yes. USB peripherals that only require low power (i.e. keyboards & mice) can be used without a power adapter. Power in this case is drawn from the host’s USB port.
When high-power USB peripherals are used, a power supply for the USB hub may be required. In other cases, the USB peripheral may require their own power adapters, in this case, a power supply for the hub may not be required. Without ample power though, the USB hub or connected peripherals may not operate correctly. It is recommended to use an included power supply when possible.
To prevent this, follow the steps below (depending on your operating system).
Windows 10 / 8
Note: You may need to disconnect and re-connect your USB device after applying these settings.
Windows 7 / Vista
Note: You may need to disconnect and re-connect your USB device after applying these settings.
Windows XP
Note: You may need to disconnect and re-connect your USB device after applying these settings.
Moving on to troubleshooting the hub itself. Attach a USB peripheral. The USB hub itself will not appear in hardware listings on your host’s system. USB devices connected however, will appear when connected. If the connected device is still not being found, try:
USB hubs do not require drivers or software.
Troubleshooting the desired USB peripheral may be in order. If the peripheral is still not being recognized, attempt:
External power is supplied by connecting to the terminal block located on the hub. For when an external power adapter is required check out the Accessories & Replacement Parts section on this product page. To view all of our hub accessories and power supplies, visit the category here.
To determine the power requirements, the equation to use is P = 5 * I * N, where:
P is the power wattage.
5 is the USB port voltage.
I is the current of the USB port in Amps (USB 2.0 is 0.5A, USB 3.0 is 0.9A.
N is the number of USB ports.
As an example using the equation, a 4 port hub would reflect a minimum wattage of 18 watts.
Knowing the minimum requirement, a proper power adapter can be chosen. In this case the voltage of a power supply should be within 7 to 24 or 7 to 40 Volts DC, depending on the specifications of the USB hub. Also, the power supply must convert AC to DC (no AC output).
Power supplies often come with a voltage (V) rating and an amperage (A) rating. To determine the current in amps, use I = P / V, where the following is true:
I is the current of the power supply.
P is the calculated power of the hub.
V is the chosen voltage of the power supply
Continuing the example, the 4 port hub requires 18 W and the power supply you choose is 12V, the current of the power supply would be I = 18/12, I = 1.5A.
Our full collection of power adapters can be found here.
Yes. The /R command performs a hardware reset of the entire hub, which will automatically disconnect and reconnect all downstream devices.
Yes. You can control all ports simultaneously using the ALL argument or specify a list of ports separated by commas (e.g., 1,2,5).
The command-line utilities are designed for easy integration with applications written in most languages, including C++, C#, VB, PHP, and Swift.
The software supports Microsoft Windows (32-bit and 64-bit) via the USBCTL GUI and CUSBC.exe utilities, Linux (Intel/AMD and ARM architectures) via cusbi and cusba scripts, and Mac OS via the CUSBM package.

Model# 12V7A2P-B
$31.99In stock

Model# CG-7PU31HB
$139.99In stock

Model# USBG-4PUSB2-MH
$28.99In stock

Model# CG-4PU31C1B1
$115.29In stock

Model# U2CHGRHUB10
$378.29In stock

Model# USBG-3X4M
$94.29In stock

Model# U2CHGRHUB20
$468.29Not in stock - Backorder allowed

Model# USBG-4U2ML
$70.49In stock

Model# CG-7PU313C
$150.99Not in stock - Backorder allowed
Need help with a Coolgear product you’ve purchased? Get product support from our on-site engineers.
Contact our sales team for assistance before you buy a Coolgear product.


Reviews
There are no reviews yet.