4-Port USB to RS232 Adapter FTDI Cable
RS-232 | FTDI
- Expand Your Serial Capabilities: Connect your legacy 9-pin serial devices through a USB-A port to add legacy functionality to newer technologies with no serial port connections. Perfect for retail applications — point of sale systems, scanners, printers, and more.
- Plug-&-Play: The adapter’s power is drawn from a USB connection for ease of access and is compatible with Windows (up to Win 11), Mac OS, and Linux.
- COM Retention: COM Ports are fully configurable, and after reboots, port assignments are preserved.
- Upstream: 1 USB port, Type A Male Connector
- Downstream: 4 Male DB9s, w/ nuts
Description
Introduction:
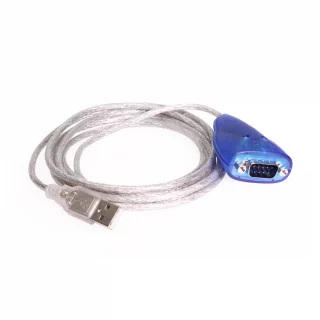
The CG-4X232FTDI 4-Port USB to RS232 Adapter FTDI Cable is 7ft in length and engineered for retail POS (Point Of Sale) terminals at sales counters such as those in banks and grocery stores. They are essentially a PC in a custom case attached to printers, scanners and displays ready for data. Some of the peripherals are integrated into the POS terminal, such as the keyboard, cash drawer, simple pole display and receipt printer. Others are external to the terminal such as scales, large flat panel pole displays, credit card readers, and bar code scanners. This serial adapter is supported by Windows 11.
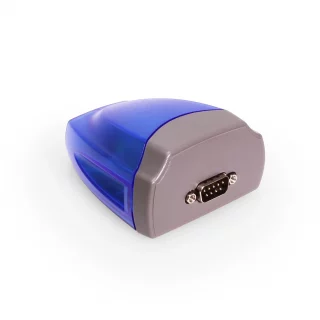
This PRO Grade 4-Port USB to RS232 Adapter is build around FT4232H from FTDI Semiconductors which is the best and most reliable Quad Serial to USB processors on the market, it also uses ZT232E RS232 transceiver from ZyWyn USA. USB cable is 6ft. total length with port identification marks on each of the DB-9 Male ends.
The upstream (USB type B connector) port supports USB 2.0 High-Speed mode to prevent from the bottleneck when all serial ports are transferring data simultaneously.
The CG-4X232FTDI 4-Port USB to RS232 Adapter Cable provides the scalability to quickly adapt to new USB technologies. Multiple modules can be added to a single USB interface allowing you to add RS232 connectivity as needed. Complete product line offers many choices to help you to expand and make your network grow with your requirements.
With the USB Plug-and-Play feature, simply plug in, follow the instructions of Install Wizard, then you are done. You don’t have to deal with Card Slots, I/O address, IRQ jumpers, DMA and others when you are connecting the devices. The System will recognize the device and install the drivers automatically. The CG-4X232FTDI is an ideal solution for your expanding applications.
Features:
- 7ft. cable length
- Provides 4 RS232 Serial Ports over USB 2.0 Port
- USB 2.0 High Speed (480Mbits/Second) and Full Speed (12Mbits/Second) compatible
- Provides 4 DB9 Connectors with Octopus Cable
- Supports Wall Mounting Kit and Optional DIN RAIL Clips
- Baud Rate up to 921.6Kbps
- Supports 7,8 Data Bits
- Odd, Even, Mark, Space, or None parity mode
- Supports 1, or 2 Stop Bits
- Powered by USB Bus Power, no AC Adapter Required
- Supported by Windows 11
USB 2.0 Port
USB 2.0 High Speed (480Mbits/Second) and Full Speed (12Mbits/Second) compatible, backward compatible with USB 1.0 and USB 1.1, the USB connector equips the Screw Lock Mechanism
Serial Ports
- Supports 4 DB9-Male UART Serial ports, the key benefits are:
- Data Rate up to 921.6Kbps
- Supports 7,8 Data Bits
- Odd, Even, Mark, Space, or None parity mode
- Supports 1 or 2 Stop Bits
- Supports Wall Mounting Kit and Optional DIN RAIL Mounting Clips
OS Support
- Windows 7, 8, 10, and Windows 11
- Linux and Mac OS 10.X
Power Requirements
- Powered by USB Bus Power, no external power supply needed.
Environmental:
- Operating Temp.: 0 to 55C (32 to 131F)
- Storage Temp: -20 to 85C (-4 to 185F)
- Operating Humidity: 5 to 95% RH
Form Factor
- 2.36”(L)x1.66”(W)x0.98”(H) (6.00 x 4.24 x 2.51 cm)
Package Contents:
- 4 port USB to RS232 FTDI adapter
- Mounting bracket
- Driver Disc
- Paper installation manual
*Surface Mounting Screws Not Included
Specifications
Product Specifications
Power |
| ||||||||||||
---|---|---|---|---|---|---|---|---|---|---|---|---|---|
Compliance |
| ||||||||||||
Physical Characteristics |
| ||||||||||||
Serial Attributes |
| ||||||||||||
Software |
| ||||||||||||
Environmental |
| ||||||||||||
Product Information |
| ||||||||||||
Hardware |
| ||||||||||||
Other Data |
|
Pin-Out
DB9 RS-232 Pin-Outs


Support
Product Documentation & Drivers
Product Documents
Software & Drivers
Need drawings, CAD files, or other compliance documentation? Click HERE
Serial F.A.Q.
Product F.A.Q.
View frequently asked product questions below. For all serial troubleshooting, visit this page.
Still need help? Reach out!
-
How do I clean and reinstall my FTDI drivers?
View Answer
-
- Download the CDM Uninstaller HERE.
- Extract the zip file, or open the “CDMuninstallerGUI.exe” utility.
- Leave the ‘Vendor ID’ set to 0403 and ‘Product ID’ set to 6001.
- Click Add.
- Click Remove Devices.
- Download the corresponding driver for your operating system and follow on-screen prompts. Windows Driver | MacOS Driver
-
-
How can I change my device’s COM port?
View Answer
-
- Click on Start and navigate to the Control Panel
- Locate and click on Device Manager
- Under “Ports (COM & LPT)” you will find your serial device titled “USB Serial Port” along with its current COM Port.
- Right click on “USB Serial Port” and click on Properties.
- Navigate to the “Port Settings” tab and click on “Advanced…”
- Once there, the “COM Port Number:” can be changed with a dropdown menu to select the port number.
- Click your desired port number (i.e. COM2) and click “OK”.
- Click “OK” once more.
- Your serial device is now assigned to your chosen COM Port.
-
-
How do I check to ensure the COM port is listed properly in Windows?
View AnswerTo ensure your serial device is installed properly, complete the following:
- Press Windows Key + R to open the Device Manager. Once Run comes up, type “devmgmt.msc” into the text field and press Enter.
- Expand the section labeled, Ports (COM & LPT).
- You should now see a COM number in brackets to the right of each port. If the device is installed properly, no exclamation points or question marks should be present next to the device.
-
I have everything hooked up, but nothing is functioning correctly.
View AnswerTo rule out potential issues, quickly test your individual components to ensure that they are working correctly individually, and are not the source of the problem:
- Serial cables
- Serial ports
- Serial devices
Test your components by:
- Hook up the serial cable(s), serial port(s), and serial device(s) in a different setup to see if the issue stems from a particular component, or the setup as a whole.
- Replace the serial cable, port, or device within your setup to further troubleshoot the issue’s origin.
When testing cables:
- Test each cable individually.
- Use short cables when you are testing.
When testing serial ports and devices:
- Press the Windows key + R, in Run, type devmgmt.msc, and press Enter to open the Device Manager. You can then check to see if your device is listed under Ports (COM & LPT).
- Ensure that the COM port number is the correct number for the serial device and that the software being used to connect the computer to the serial device uses the correct COM port number.
- If the device is listed with an error, follow the instructions on the website to reinstall the drivers.
-
Serial communication is not functioning correctly, how can I tell if the problem caused by the adapter or my serial software application?
View AnswerOlder serial communication applications make use of legacy hardware addresses, often incompatible with PCI, PCIe, and USB to Serial products. Contact the software provider to troubleshoot.
-
I am receiving an error when I try to install the drivers in Windows 8 64 bit.
View AnswerDriver Signature Enforcement in Windows 8 may need to be disabled in order to use various drivers. After disabling this feature, the driver will be allowed to install.
Note: You are required to restart your computer after disabling the Driver Signature Enforcement. Save all open work on your computer.
Disable driver signature enforcement:
- Press the Windows key + C.
- Click Settings > Change PC Settings.
- In the left pane, click General.
- In the right pane, under Advanced startup, click Restart now.
When your system restarts:
- Click Troubleshoot > Advanced options > Startup Settings > Restart.
- Press 7.
When your computer restarts, Driver Signature Enforcement will be disabled and you can install the drivers.
-
I am receiving an error when I try to install the drivers in Windows 10 64 bit.
View AnswerDriver Signature Enforcement in Windows 10 may need to be disabled in order to use various drivers. After disabling this feature, the driver will be allowed to install.
Note: You are required to restart your computer after disabling the Driver Signature Enforcement. Save all open work on your computer.
Disable Driver Signature Enforcement:
- Click the Windows icon in the taskbar.
- Click Power.
- Press and hold the Shift key and click Restart.
After your computer restarts:
- Click Troubleshoot > Advanced Options > Startup Settings > Restart.
- Press 7.
When your computer restarts, Driver Signature Enforcement will be disabled and you can install the drivers.
-
Why did the software not install properly in macOS High Sierra (10.13) or later?
View AnswerHigh Sierra 10.13 and later versions of macOS enforce strict security policy revisions. In order for the device to operate, software packages like those used in this installation must be allowed in macOS Security and Privacy settings once the software is installed.
Once the driver/software is installed, follow these steps to allow the software:
- Open System Preferences.
- Open Security & Privacy.
- Click the Allow button near the bottom of the General tab.
Reviews
There are no reviews yet.